
How & when to adjust car passage estimations
Car passage is considered as a location characteristic that you can 'score' correctly for existing and simulated locations.
It represents the passage volume relevant for a location, by car on the different road segments from which the charging stations can be accessed.
1. The default passage configuration of locations
The application uses an automated snapping algorithm to determine which roads are relevant for a location. As a result the car passage score is pre-filled with default values when a new location is opened in the simulation. This is referred to as the default passage configuration of a location.
The total passage volume of a location is initially unconfirmed. The application already suggests which road segments are considered 100% relevant. It is therefore the user’s responsibility to either:
- Validate and confirm the default configuration, or
- Adjust the configuration and confirm the updated selection.
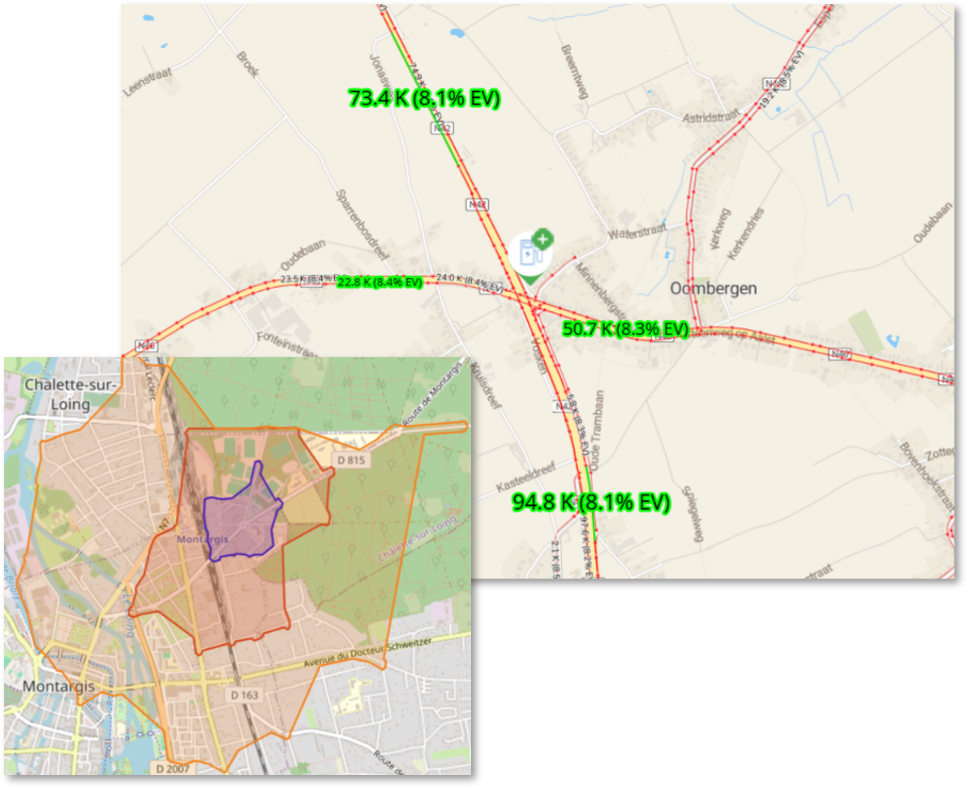
By default, the passage potential is calculated by an algorithm that evaluates multiple scenarios (based on a drivetime isochrone, taking into account local traffic congestion situations) and automatically selects the highest one considering the defined relevance in each isochrone:
- Scenario 1: Number of vehicles from up to 4 directions within 45 seconds isochrone (100% relevance)
- Scenario 2: Number of vehicles from up to 4 directions within 2 minutes isochrone (66% relevance)
- Scenario 3: Number of vehicles from up to 4 directions within 3.5 minutes isochrone (33% relevance)
In truck apps, the number of vehicles is defined by the number of trucks per week. In car apps, the number of vehicles is defined by the number of electric vehicles per week
Example: If the number of vehicles obtainable in scenario 3 with a relevance of 33% is higher than the number of vehicles obtainable in the 45 seconds isochrone with 100% relevance, then scenario 3 will be selected for that location.
2. Where to check the default passage configuration of locations
The default passage configuration can be verified in 3 modules: Data Management (only for powerusers), Marketing Efforts and Location Planning. The flow to verify is more or less the same for all 3 modules.
1. First make sure you have selected the right data period. The default passage configuration of locations might change per period (due to updates of the datapacks and the snapping algorithm).
2. Find the location logo on the map. Click on the location marker to open the pop-up window. In general you'll find a mini-map on top of the pop-up where you can see the connection of the location to the road segment. There are 2 possible map layers to display here: 'Connection road network' (default) or 'Car passage' (this might also be 'EV passage' in BE and FR apps). Click on the car passage to check which road segments are included for the default passage config (indicated in green or yellow). Consult the legend to understand the colours.
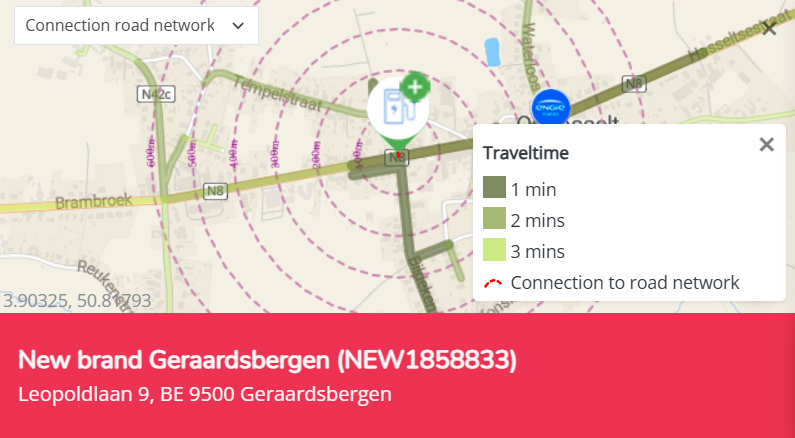
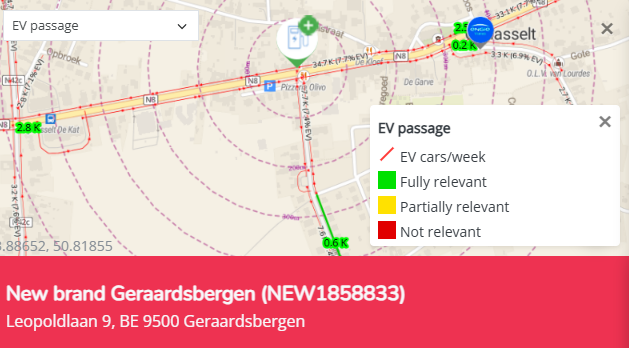
This map layer indicates which road segments are considered relevant by the algorithm. If no road segments were considered all segments will be red. If you then scroll down a bit in the pop-up you'll see the exact number of the default passage configuration.
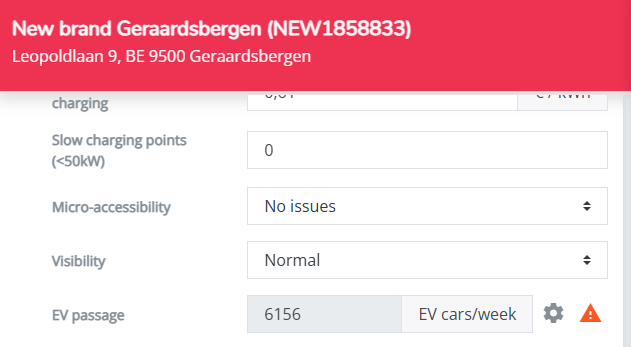
Remark. Depending on the module you are doing this, the pop-up might look a little different > Marketing Efforts vs. Data Management & Location Planning; This is because in the last two modules you also have the option to update the default configuration & confirm the new number, see also below.
3. When to update and/or confirm the passage configuration of a location
In the following cases it might be necessary to update the car passage configuration:
- Wrong connection to the road network: The location is connected incorrectly to the road network, resulting in a wrong road segment snapping. In this case first follow the steps here before continuing.
- Complex road network: In some cases (mainly highway areas) it is possible that the road network is very specific which results in a wrong snapping.
- Competitor closer to road segment: A competitior is located closer or better to a selected road segment, making it more attractive to cars passing by (see (4) 'Competitor correction' below).
4. Specific rules & limits to apply to the passage configuration of a location
- Do not select two subsequent road segments, as this may result in counting the same passers-by twice.
- Never select more than four road segments. The predictive model is calibrated for a maximum of four selected segments. Selecting more than four segments may lead to an overestimation of the predicted usage.
- Competitor Correction: If one or more competitors are located closer to a selected road segment than your location and if roads are selected at 45 seconds away (scenario 1 - 100% relevance) from your location, only part of the passage should be considered relevant for your site:
| Number of competitors closer to the road segment | Relevant share of passage |
|---|---|
| 1 competitor | 40% |
| 2 competitors | 20% |
| 3 or more competitors | 10% |
Note: Please note that this only applies to cases where roads are selected at 45 seconds away (scenario 1). In the other 2 scenarios, the relevance correction factor already implies a penalty for distance and better located competitors
- Road segments from different isochrones should not be combined. Apply the following relevance factors when selecting new/other road segments depending on the isochone (drivetime distance):
| Drivetime distance | Relevance |
|---|---|
| 0 – 45 seconds | 100% |
| 45 seconds – 2 minutes | 66% |
| 2 – 3.5 minutes | 33% |
| > 3.5 minutes | Exclude |
Note: To help you understand which road segment belongs to which isochrone, we will visualize those isochrones in an upcoming update
5. How to update and/or confirm the passage configuration of a location
This is only possible in the Data Management and Location Planning modules.
Real location changes in the baseline nework vs. simulation locations
- use Data Management for real passage edits & confirmations (on all user accounts since saved to the baseline period)
- use Location Planning for simulation passage edits, mainly important for new locations (only on your user account and not saved to the baseline period)
To update the default configuration, go further from the last step (2.) in the section above. Click on the cogwheel icon left of the exclamation mark. This will open the passage configuration window.
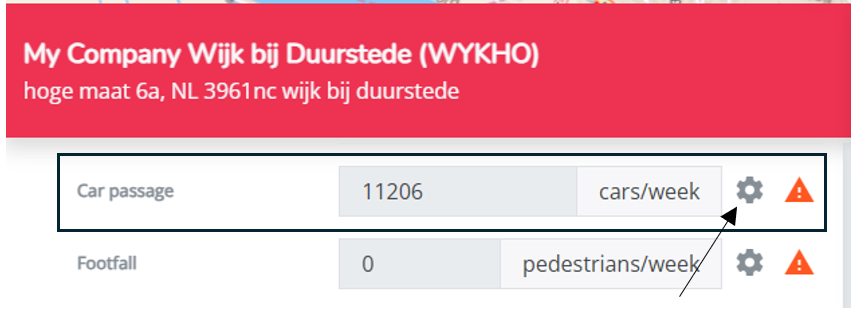
The passage configuration window offers you an overview of which roads are considered relevant to the selected location in terms of passage. This window allows you to (1) confirm the default passage configuration or (2) update the passage configuration by including/excluding roads and finetuning the relevance % (see below).
If you wish to update the total passage volume of the selected location, you can do so by including road segments, excluding road segments, and/or edit road segment relevance % one by one. In case you want to adjust the default passage configuration:
- On the mini-map, zoom in and click on the exact number of the road segment you want to update (the road segment will turn blue, which means it's now selected to make changes)
- Use the slider to decide whether to include or exclude.
- Define the relevance for location correction factor (see above)
- Update the total relevant passage by clicking on the update passage button
- Consult the total relevant passage number after making the change(s)
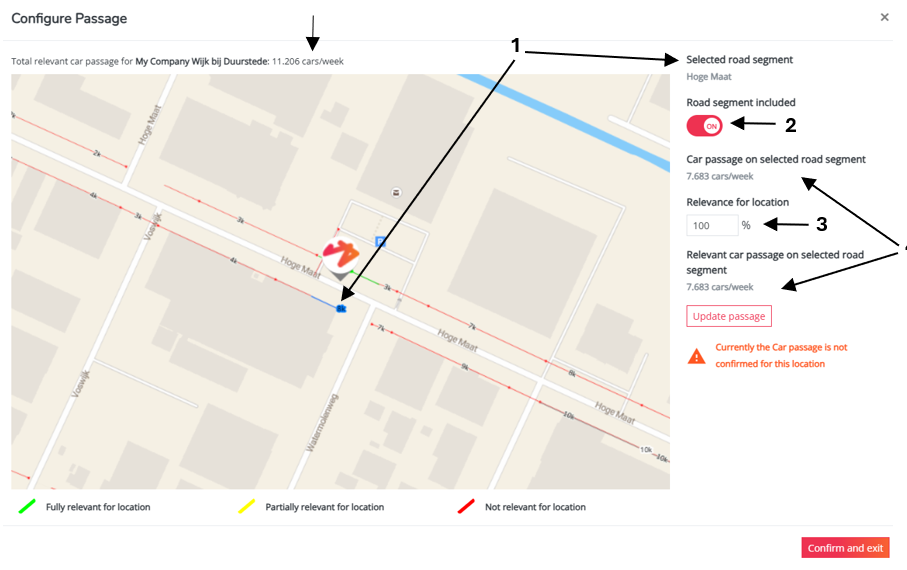
You now have the option to (de)select another road segment. After the passage situation is completely corrected according to your estimations, confirm the updated passage configuration by pressing 'confirm and exit'.
After confirming, the orange warning icon will have disappeared in the location pop-up window. This means that the total passage volume of the location has been confirmed (at least for the simulation respectively (Location Planning) or for the baseline network (Data Management))

Now scroll down in the location pop-up & press apply to apply the changes. In Location Planning you will still need to calculate the simulation results.
Remark!
Note that you cannot confirm passage configurations in bulk. Passage configuration must be done location by location. However, you are not required to confirm the default passage configuration of (all) locations. The model will calculate with the default values anyway. For new locations it's better to validate and adjust according to your estimations